![]()
![]()
the steps of installing your own pond
I will also add tips on finishing and blending for a more natural appearance
some time this summer along with current pictures of my pond.
Pictured below is the area that I selected for my pond. When selecting an area for your own pond several things need to be considered, The first being light most waterplants need minimum 4-5 hrs. of direct sunlight a day for good blooms
I prefer morning sun as afternoon sun can be hard on new lily pads(temperatures over 110-112 are common during the summer here) in Northern California
Direct afternoon sun also places limits on the types of plants you can use around your pond, one of the keys to achieving a natural look about your pond is the use of plants that would normally be found in cooler shaded areas and near water such as ferns etc..
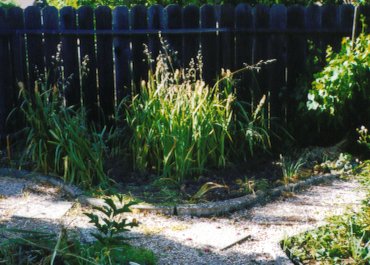 Not much to look at before I started
The second thing to consider is location of your pond with regards to power , plumbing and viewing angle
The lines along the lower edge of the pond site pictured below indicate the location of my power and plumbing
below is the site after being cleared and expanded
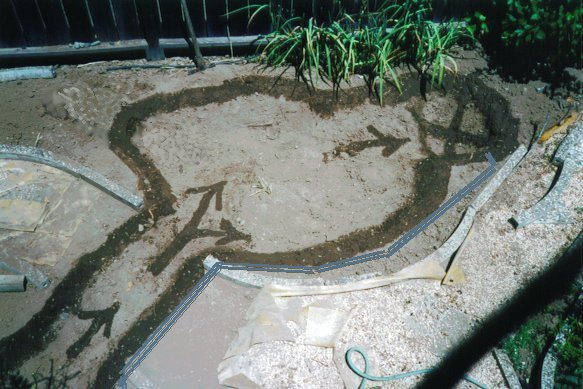
The arrows in the picture above indicate the direction of flow of the water, Establishing a flow pattern can be very important in keeping your pond clear, The X in the upper right corner indicates the location of the Bio-Plus filter.
For my pond I used the BP-300 with 2 layers of the pre filter matting connected to a Rio 2100 pump(The BP-300 is rated for 300 gallons which I believe is a conservative rating as I've used this same pump-filter combo up to 800 gallons with 3' of head and crystal clear results) To simplify installation and removal of the pump I used 6-8 " of 1" clear PVC hose between my pump and the main 1 1/2 pipe that feeds the streambed and runway, To boost flow in the runway below my stream I Installed a tee with a valve to regulate flow, then continued on up to the streambed with 1"PVC pipe.
Next to the 1 1/2" PVC I laid 3/4 non metallic conduit (installing wire as I went) to power the pump
. The X in the upper right corner indicates the location of the pump and filter which I later covered with flagstone as seen in the final picture
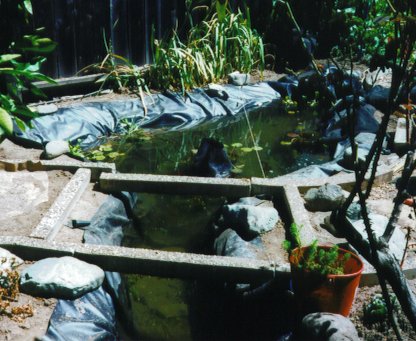
This picture shows the runway under the bridge which has a valved input separate from the stream, giving the fish a healthy current to swim against.
In addition it also keeps the top surface of the pond clear by pushing leaves and debris to the bio filter(as noted in the flow diagram above)
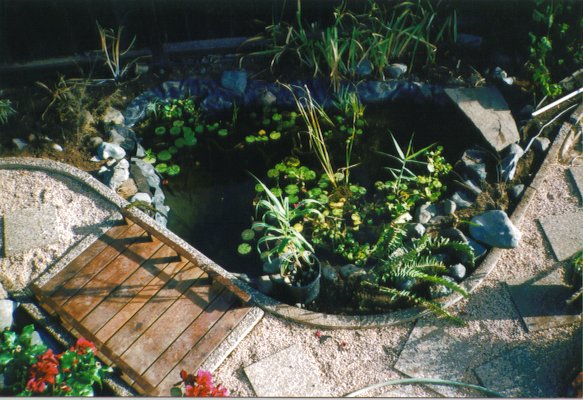
This is midway through my pond project. This gives you a good view of the pond which is approximately 750 gallons. The pump is a Rio 2500 connected to a bio-plus filter from Pond Systems of Santa Rosa CA.
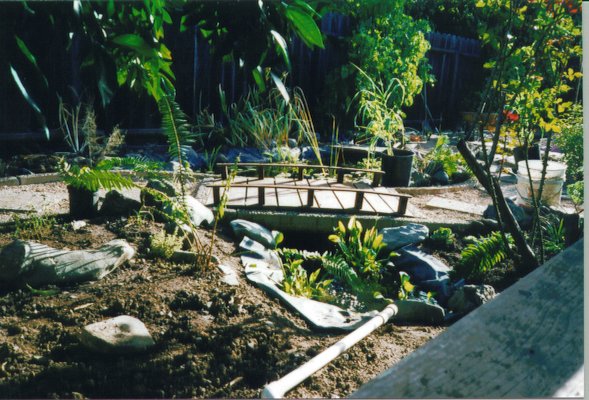
This is my pond nearly done

This pond I installed approx. 2yrs. ago in front of our offices, since then it has become home to numerous bullfrogs catfish and goldfish
This page is still under construction and will be updated about once a month through May and June.
I hope you've enjoyed it
Questions or comments may be sent to Dave@newworldmfg.com
New World Mfg.Inc. Home Page / Lining materials / Pond liners / Tank and reservoir liners